Introduction
There are a few outstanding programming languages which have a huge impact on current state of the market. Two of them, especially important in context of mobile development are Kotlin by JetBrains and Swift by Apple. In this series of posts we’ll focus on comparison of what these two languages have to offer, parts have in common and what each of them can learn from the other. The purpose of this series is to get deep understanding of these languages and their compilers so stay there if that’s what you’re interested in.
Work environment
As I’m most fluent with JetBrains IDEs, I’ll present how to start working with these languages using their tools. The benefit of this approach is that I can use my Debian machine to compile Kotlin as well as Swift and have an intelligent IDE with code understanding for both languages.
Kotlin environment
Kotlin compiler
In case of Kotlin development we can use the known Gradle wrapper script that is responsible for downloading all dependencies, including Kotlin compiler by using proper plugin in script. You can find standalone version of Kotlin compiler on GitHub, but the easiest approach is to work with Gradle model.
Kotlin IDE
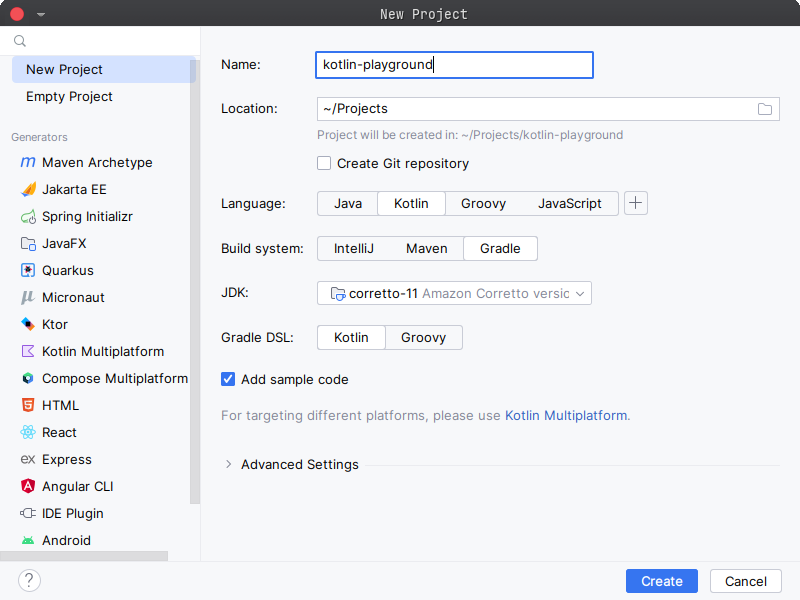
Using IntelliJ IDEA by JetBrains is the easiest way to start with creating gradle project. However, it might bring some surprises as well. From my perspective, it’s important to set up the project structure properly. So to generate a Kotlin Gradle project, we can use available wizard, but we need to take care of proper selection of JDK when using Gradle. It turns out that for now Gradle doesn’t work with JDK 21, which might be the only one available on your machine after installing IDE. The cool part is that you can download the selected JDK directly from IntelliJ. It’s really helpful to don’t bother about all the paths and download sources for these SDKs. Personally, I like Amazon Corretto 11 JDK which will be definitely enough for this series of posts. After downloading it, we can create our project with a few clicks in wizard.

Swift environment
Swift compiler
To work with Swift on my linux (Debian 12) machine, I download latest release version from Download Swift and install the dependencies. I use the Ubuntu 22.04 version as it corresponds to Debian Bookworm the most and seems to be working pretty fine so far.
The whole process starts with installing the latest packages available for Debian Bookworm with
| |
The next step is to unpack the downloaded Swift compiler with e.g.
| |
and then move it to opt with
| |
and finally add the installation path to PATH variable.
You can do it by appending extra line to ~/.bashrc
| |
and apply changes with
| |
If everything went well, calling
| |
should print our Swift compiler version.
Swift IDE
The default option for most of the developers is XCode, only because it’s the easiest and the most straightforward option on MacOS. It’s really convenient to do Swift development on Apple devices but we need to highlight here that Swift is an open-source language and can be compiled on many platforms.
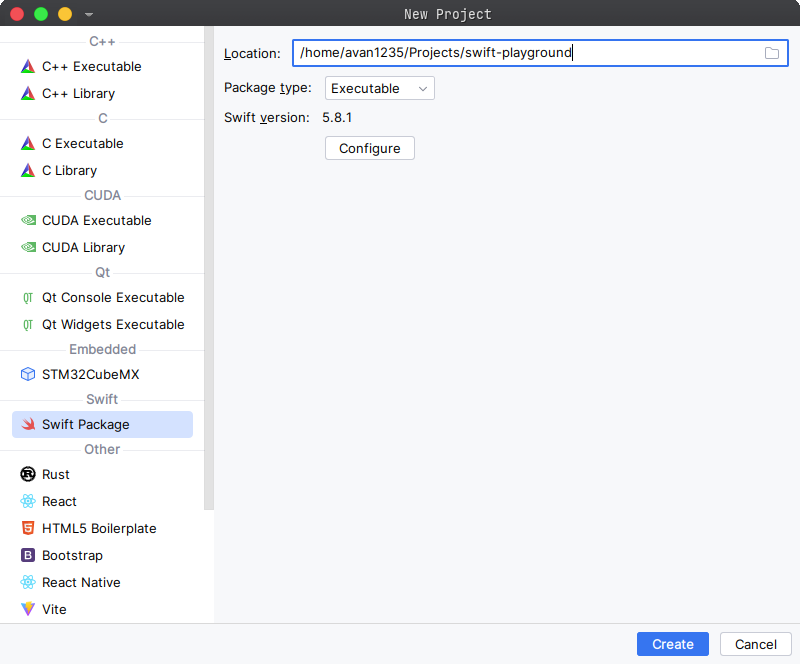
I personally like using CLion by JetBrains with Swift plugin. One of the reasons is familiarity with the whole family of products, the other is my own contribution to functionalities of the plugin from my internships at JetBrains. It’s the only plugin that is not only based on Source-Kit (i.e. LSP implementation for Swift) and provides support for Swift in JetBrains products.
To configure plugin after installing, it’s enough to set Swift toolchain path
under Build, Execution, Deployment > Swift. Then we can start with creating
new project being executable Swift package.

Summary
According to this post, one can assume that setting up Kotlin is much easier than dealing with Swift. But we need to remember about the specific environment that we work in. Although Swift is designed to be used on MacOS, you can compile with it on Linux and Windows machines as well. In case of Kotlin, we’re in JVM world which is universal and doesn’t depend a lot on operating system.
![Featured image of post Kotlin vs Swift [#0]](/img/featured/featured-kotlin-swift.jpg)